Showing posts with label successes. Show all posts

Wednesday, 28 March 2012

Baked Chocolate Philadelphia Cheesecake

I got a request!


When taking the cats photos at the place my Mum works, one of her colleagues mentioned the new Cadbury's Chocolate Philadelphia, which is on offer in every supermarket at the moment because it's new. This made it a fairly cheap option for a cheesecake, and of course I couldn't turn down someone asking me for cheesecake... I've been itching to make another one since our New York Cheesecake and I'm most fascinated by the baked ones, especially as I have a vegetarian mother so gelatine is a no-no. There appeared to be only one recipe specifically using this new Philadelphia, so I did a slight mixture of that one and Smitten Kitchen's New York Cheesecake, and sugared to taste... I will do my best to remember what I did, as most of the rest of the recipe followed "AMummyToo"'s recipe fairly excatly apart from the sugar, and that was just personal preference.

Then I topped it with my first home made chocolate curls, using the method described here, minus the shortening because I didn't have any. Worked a treat still and I was pleased with the overall effect, and white chocolate was a nice contrast.

However, I did learn one very important lesson. Don't put your chocolate curls on the cheesecake until it is completely cold. They WILL melt.

Um, then it sort of never made it to Mum's work. Because my brother sampled a piece (just to check, y'know...) and declared it the "best... cheesecake... EVER." He's a tough customer sometimes so I am more chuffed with this critique than I can possibly express, especially as he's in the middle of food GCSE and I'm starting to feel a bit homegrown and hodgepodgy sometimes. I just had some in the garden, in the sun, after 2 night shifts, and I may have to agree with him. I really think it was better than our New York Cheesecake! The (comparative) thinness worked in its favour, meaning it was, as "AMummyToo" said, fudgy. And delicious.

Baked Chocolate Philadelphia Cheesecake
Quick and easy. An amalgamation of recipes, the majority of it from this recipe by "AMummyToo" and some inspiration on sugar amounts and bases taken from Smitten Kitchen's New York Cheesecake. 

For the Base
300g milk chocolate coated digestives
100g unsalted butter/margarine
Approx 50g sugar (to taste, really)

For the Filling
100ml double cream
480g chocolate (Cadbury) Philadelphia (3 standard 160g tubs)
About 100g sugar (to taste, again)
2 well beaten eggs
20g plain flour


For the Chocolate Curls
Approx 6 squares white chocolate


To make the buttery biscuit base


1. Grease a springform pan. The original recipe didn't specify a size - I used a 23cm one and ended up with a fairly thick cheesecake.  (I just realised that I'd written 23 inch when I wrote this post over a month ago... oops. I doubt anyone actually tried to get hold of a 23 inch pan...)


2. Mash up 300g of chocolate coated digestives (or any biscuit that takes your fancy) fairly finely. I used the end of a wooden rolling pin.

3. Add the sugar and mix.

4. Add the butter and mix.

5. Press down firmly into the tin with the back of a spoon until level and well packed. Cook for 5 minutes at 200C/180C Fan.


This is best done while dancing around your kitchen to this song. I cannot thank my boyfriend enough for introducing me to it (except when you have it stuck in your head... You're welcome).


Also, yes, my netbook lives with me in the kitchen now. I'm saving paper by not printing recipes out... so far I haven't got too much chocolate/water/assorted kitchen gloop on it.

To Make the Cheesecake Filling

1. Turn the oven down to 170C/150C Fan/Gas Mark 3.
2. Put the chocolate Philadelphia and sugar into the blender and start whizzing at full speed.
3. While still whizzing, pour in the eggs bit by bit, then add the flour and cream.
4. Blend until it’s lump-free. Make sure to scrape down the sides AND give it a mix with a spoon because otherwise you're likely to end up with unmixed Philadelphia, especially if you use a stand mixer.


5. Pour the mixture on top of the biscuit base and bake in the oven for 45 minutes to an hour (mine took 45 minutes in a 150C fan oven in a 23 inch springform) until it’s well-cooked at the edges and firm but slightly wobbly in the middle.
6. Turn off the oven and leave the door ajar for another 45 minutes to an hour (again, I left it for 45 minutes with the door only very slightly ajar).
7. Take out the oven, run a knife round the edges and chill in the fridge for an hour minimum. My brother had his bit about an hour after I'd put the chocolate curls on, so an hour after it was truly cool, and Mum says it was a bit runny still. After a night in the fridge it had firmed up to a perfect fudgy consistency.


To make the Chocolate Curls
  1. Melt the white chocolate in a bowl
  2. Spread fairly thinly on the back of a baking tray
  3. Pop into the freezer for 5 minutes
  4. Take it out and use a knife, sharpish spatula, potato peeler, cheese slice etc. (I used the last one) to make curls. You might want to leave it a few minutes to melt very slightly, there will be a sweet spot before it gets too melty where you get good curls.
  5. MAKE SURE THE CHEESECAKE IS COMPLETELY COOL BEFORE PUTTING THE CURLS ON!!!!

Tuesday, 20 March 2012

"Use ALL the flavours" Chocolate and Coffee Banana Layer Marble Cake with Maple Icing and Walnuts

I came across a recipe for banana cake with maple icing in a pullout from the Waitrose paper my Nan saved for me the other day (all my family now save me recipes, it makes me so happy! Thanks guys).


Anyway, we've been on a maple rampage since getting our waffle maker so, for the first time in my life, there was some in the cupboard. For some reason, I have a bit of a brain issue when it comes to the word maple. I randomly interchange it with 'pecan' and have no idea why, apart from the fact they are two flavours that are a recognised and popular combination. Either way, MAPLE is good. Maple syrup is something I wish I had known about years ago. Actually, no, scratch that, I'd be even fatter if I had. But it's in my life now and I wanted it in/on/around my banana cake.

But then I got to thinking...


"So maple and banana go together, huh? But I also fancy doing a chocolate marble effect. That would probably work, I've seen recipes for chocolate banana cake. Coffee always helps the chocolate flavour along, so maybe I should put some of that in there too... Ooh, and I know that coffee and walnut go together, so let's top it with walnuts."


So I ended up with Franken-cake, really. I'd do it again.


Honestly, I have never seen my Mum eat a piece of cake so fast. Plus I almost thought I'd washed the icing bowl and not remembered... but it turned out she had just licked it clean. I'd call that a ringing endorsement of the whole maple buttercream thing...


p.s. Thank you, Mum, for artily arranging the walnut halves!


"Use ALL the flavours" Chocolate and Coffee Banana Layer Marble Cake with Maple Icing and Walnuts
The banana cake recipe is one my Mum has used for donkeys years, but in essence it's just a Victoria sponge mix with 2 bananas mashed in. My change was to split the mixture after adding the eggs and add cocoa and coffee to one half. The icing recipe didn't come from the Waitrose supplement in the end, though it was what sparked this cake in the first place. I used the standard buttercream recipe off the back of the Tate and Lyle Box and then just modified it slightly. You may need slightly more or less icing sugar to get the consistency right - or just add more or less milk! This made enough icing to fill the cakes, and completely ice the top and sides too.


For the Sponge
6oz sugar
6oz margarine
5oz self-raising flour
3 eggs
1oz cocoa powder
1 tsp coffee granules and a little boiling water (optional if you don't like coffee)
2 ripe bananas, mashed


For the Maple Buttercream
7oz icing sugar
3 tbsp maple syrup
3oz butter or margarine (sacrilege, but we always find margarine works better for us)
Approx 1/2 tsp milk, depending on consistency
Around 8 walnut halves (pecans would probably also work nicely)


To make the sponge


1. Preheat the oven to 180C and grease and line 2 sandwich tins (I was using silicone so, um, didn't).

2. Whisk together the margarine and sugar - the longer the better. I just left it in our stand mixer for 5 minutes while I went off and did some stuff, coming back to briefly scrape down the sides. I love that thing.


3. Add in the eggs, whisking between each addition. My mixture curdled terribly at this stage but don't worry about that.

4. Place a bowl onto the scales, zero, and pour the mixture in. Halve this number and place your original bowl back on, zero, and put half the mixture into that. You could do this all by eye or by guessing the weight of eggs, but I just found this best for me.


5. Sift in 3oz of flour to one bowl, fold in, and add 1 mashed banana. Set aside.


6. To the other bowl, sift 2oz of flour and 1oz of cocoa powder. Fold in, then fold in the other mashed banana.

7. Divide the plain mixture between the two tins, in dollops for the marble effect (see my marble cake recipe too). I did this by counting out spoonfuls to make it as even as possible.

8. Add the chocolate mixture in the same way, filling the gaps between the plain mix.

9. Give it a quick swirl and level it slightly without disturbing the mixture too much. The one on the left has been swirled and the one on the right has just been dolloped - see the difference?


10. Place in the oven for 20-25 minutes, until they spring back when touched. When slightly cooled, run a knife around the edge, turn out onto a cooling rack, and leave to cool completely.


To Make the Maple Buttercream

1. Place the margarine/butter into a fairly large bowl. Cream this first if you want - if it's already fairly soft you might be okay if you're careful. I make buttercream with a fork just so I can be gentle and not get icing sugar everywhere.

2. Gradually sift in 6oz of the icing sugar, reserving 1oz for later. Beat in until smooth.

3. Add the maple syrup.

4. Sift in the remaining 1oz of icing sugar.

5. If you need to alter the consistency, either add more icing sugar or add a little milk.

6. Ice the bottom of one of the cakes (i.e. flip it upside down so you have a nice smooth surface).


7. Place the other cake on top. Ice the top and sides.


8. Top with the walnuts or anything else you desire.

Wednesday, 14 March 2012

Blackcurrant Waffles - and the best waffle recipe so far!

The quest for waffles is never ending. However, the quest for the best recipe may be over (at least for us). This may now be our favourite, and this is probably my second favourite filling/topping combo, after chocolate sauce with chopped hazelnuts. For me, this even tops the classic maple syrup and (ice) cream...

We had a lot of blackcurrants left after our cheesecake exploits, basically. They're a good source of Vitamin C. Sadly fresh ones are more difficult to source... curse you, Ribena, and your use of 95% of the crop!

But tinned ones are relatively cheap (89p a can as of writing, at Tesco) and work very well!


The Best Waffle Recipe (So far...) - Plain Version


These rise like billy-o and taste good to boot! The recipe comes from an ancient and very well used cookbook owned by my boyfriend's Mum. It's the only one we've tried using self-raising flour but it rises the best out of all the ones we've done, even better than the one using 4 whole teaspoons of baking powder!


2 eggs
2 teaspoons sugar (we used 3 tablespoons, naughty us!)
175ml milk
75-150ml water
1 teaspoon vanilla
225g self raising flour
Pinch of salt
2 tablespoons cornflour
125g melted butter

A NOTE ON THE WATER: The first time we think we may have accidentally left the water out, and we really liked the batter. We now use half the amount of water (75ml), which gives a great consistency, but sadly tends to result in 3.5 waffles rather than 4. We've decided it's worth it... quality over quanitity. 

1. Beat egg yolks and sugar together, then beat in milk, water and vanilla
2. Gradually sift in flour, cornflour and salt, beating constantly then beat in melted butter
3. Beat egg whites and fold in (gently, people, gently!)
4. Set aside for 10 mins
5. EAT!
6. WELL... COOK THEN EAT!

(The last 2 are the most important. Possibly just the last one. Thank you boyfriend. I'm sorry I keep sharing your involvement today...)


Blackcurrant waffles

The recipe is exactly the same as above, but after pouring the waffle batter into the machine, dot as many blackcurrants as you fancy into it, then shut the lid. Cook as normal, then top with more blackcurrants and some of the blackcurrant juice, mixed with a little sugar if you wish. Best served with ice cream.

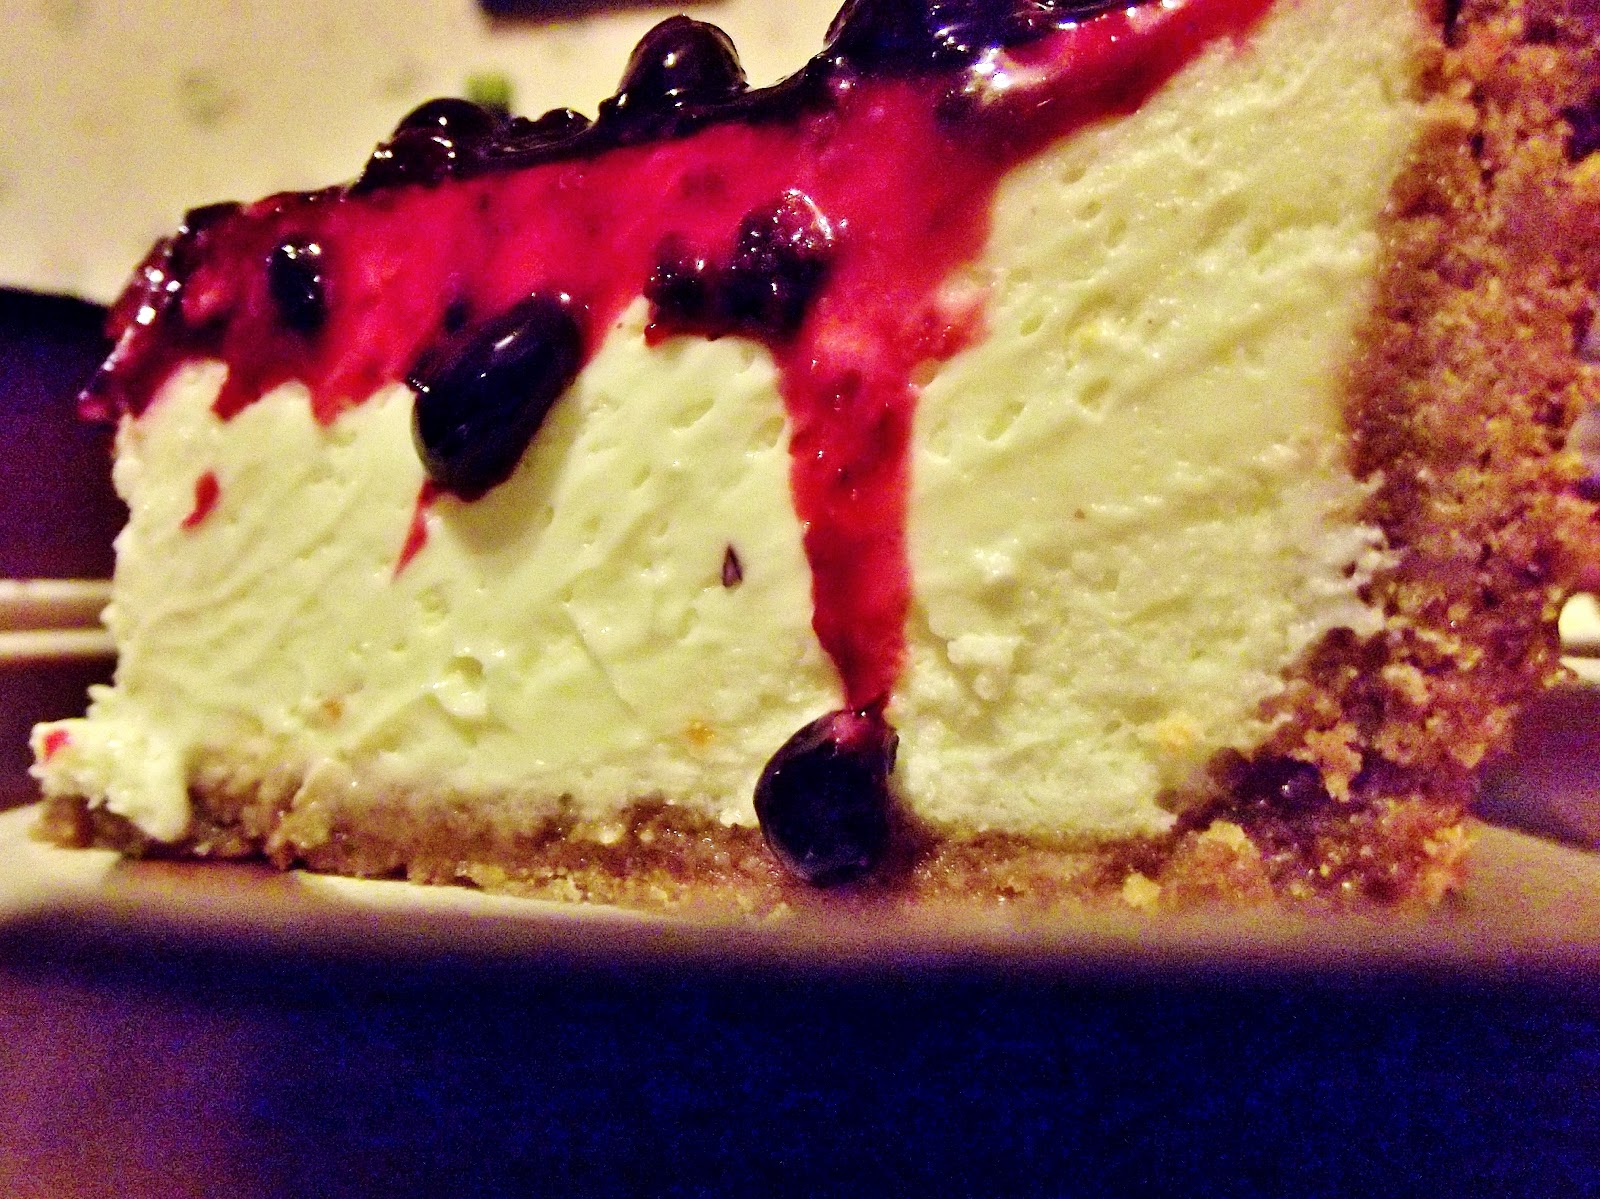
The Best Blackcurrant New York Cheesecake in the Universe


This cheesecake has been a real saga. It's been two months in the pipeline, almost didn't get made for several different reasons, was very nearly a complete disaster - and then ended up being the best thing I've ever made.

Actually, that's complete rubbish. It's the best thing I've ever had a hand in, because my lovely boyfriend did well over half the work (despite repeatedly professing that he 'doesn't really do baking') and without him it would have been a runny pile of burned slop. I would not have had an excuse to make it if it hadn't been for him either - but we both became infatuated with it after I sent him the photo from Smitten Kitchen, over which I was drooling at the time. Despite it being January, and our anniversary being March, it was sort of decided within about a minute that it would be made, albeit with blackcurrants as a topping rather than cherries.


Now, a project like this requires prior planning because we knew the ingredients were going to be expensive. Add in the fact that I didn't have a big enough springform... well, that was solved by valentine's day. My Mum was left with a beseeching request to buy 4 tubs of cream cheese while it was on special offer at Tesco's, seeing as I would have been extremely unpopular (and unwise) if I had left that in our shared uni fridge. On the day the offer ended (about 3 weeks later) I called her up to check she had it, and she hadn't been able to get any (variously out of stock and a broken down car). My boyfriend came to the rescue, completely clearing out the local Tesco Metro's stock of Philidelphia, and we were on our way again.

Also, blackcurrants. It seems that even when they are in season, they're very difficult to get hold of fresh, and in March it was a losing battle. Actually, getting hold of them in any form was more difficult than anticipated, but eventually it transpired that Tesco had recently started doing them in tinned form, so that was that (until we were about to top it and I realised that the drained weight was only a third of the can weight and we were probably definitely going to need another can...)


On the day we were going to make it (and by we I mean three of us as my brother helped too) we all piled into the fairly small kitchen and set about smashing biscuits in three different ways. The potato masher didn't work initially but was helpful later on, I can't remember what was tried next, but the winner was the end of our wooden rolling pin, the star of the show. 

My boyfriend did an absolutely stellar job of getting the biscuit neatly up the side of the tin, and fairly uniform the whole way through! However, rather than the 225g of biscuits stipulated in the recipe, we found we needed the full 300g pack, and even then he said he'd still have liked the bottom to be slightly thicker, so I think next time we'd even consider going for a 400g back! Oh my arteries (shudders at the amount of butter used to hold it all together...)

The mixing of the filling ingredients seemed to go great. The bowl was only just big enough!


But then we hit a bit of a snag when we poured it in to the base. It seemed that the mixer hadn't quite got all the way to the bottom... and there was a huge pile of unmixed cream cheese left in the bowl. Some was hastily ladelled out (we had enough filling left over for a whole 21cm cheesecake! I'll post that one later...) and, while I covered my eyes and peeked out nervously, my boyfriend proceeded to give the mixture another whisk... in the base.

It worked! There were a few splashed over the tops of the biscuit, but it was fine and much better mixed. My hero!


Now onto the cooking. Our oven's dial stops being marked after 240 degrees centigrade, and I needed to be up at 293. I decided to chance the 'mystery temperature' setting, which I assume was somewhere between 260 and 280. The cheesecake never puffed (the smaller, leftover mixture one did, however, a lot) but did top brown quickly, and I caught it but then didn't cool the oven down fast enough, so was terrified I'd burned the lot. Turned out I didn't need to worry, it was all fine. You can see a ring of slightly singed biscuit, but that was actually very tasty and I'd almost try to do that again...

Now, you may notice that we've changed worksurfaces. That was because it was cooked at my house and then assembled at my boyfriend's. His Mum saved us when it came to making the sauce, as the first batch went awry and was basically blackcurrant jelly (moral - stir it as soon as the cornflour gets in the hot mixture). I learned an awful lot about sauce making that I will use in all sorts of recipes now, so it was a really useful experience. I do freeze up in my boyfriend's kitchen, though, and tend to stand around like a bit of a lemon (though more so if his parents are watching), because when I'm cooking, I'm usually a bit unconventional and random, which I don't feel I can be when people might *gasp* judge!

A note about photography - our house is a 200 year old cottage with hardly any natural light, and we did the assembly at night. Hence I didn't have nice light to work with at any time (plus a hungry bunch of people geeing me up) so excuse the photos.


But that is a veritable sea of blackcurrants! Absolutely delicious. It's a berry deep the whole way across and that took two 290g tins (drained weight 115g each). My boyfriend said he'd like to double the thickness of the topping next time. Eep. 

*checks purse*

As delicious as it was, I don't think I can afford to make it again for a while!


The recipe can be found here, at Smitten Kitchen. Our observations are as follows:

1. There was enough filling for this 24cm cheesecake and a thin 20cm one too
2. Maybe use slightly more orange zest - the flavour of the filling was lovely, however, even though you couldn't distinctly taste the orange, so maybe that's actually how it's meant to be.
3. Really check all your cream cheese has mixed in properly before pouring it in.
4. Thick toppings are good. 
5. If you want nice thick biscuit base, you're more likely to want 300-400g of biscuits (being Brits, we used Digestive biscuits, not Graham crackers) rather than the 225g in the recipe.


Sunday, 4 March 2012

Scone-athon Part 3: Plain scones


Other Scone-athon posts
Part 1: Hickory Smoked Nuts and Seeds scones
Part 2: Nutella Scones


It was grim and rainy outside, with the odd flurry of snow, and it's nearly the last week of term here. I wanted something simple but yummy to bake to wake me up this weekend. I'm determined to master scones now, and the ingredients are so cheap that I decided I could have a few goes...


The Recipe
This is the same recipe that I used the other day in my Hickory Smoked Nuts Scones, and it's a recipe by Audax Artifax that the Daring Bakers used for their January 2012 challenge. Audax wrote a huge amount on the art of scone baking after some tireless research (16 batches of scones! I'm exhausted after 4!) so I'd really recommend you head over to his site and have a good long read, because you'll learn so much. But, just for ease, I'll post my short and sweet version of it here.

140g plain flour
2 teaspoons (10g) fresh baking powder (I used 3 teaspoons, which is 15g, because mine's been open longer than 2 months)

1/4 teaspoon salt (I had some salted butter to use up so omitted this)
30g butter (preferably frozen and grated, alternatively just out of the fridge and diced)
Approximately 120ml milk


1. Preheat oven to 240 degrees c.
2. Triple sift the dry ingredients from a height.
3. Rub butter into dry until resembled beach sand (see Audax's recipe if you want a different texture).
4. Add nearly all the liquid and stir until a sticky dough is just formed. Add the rest if needed.
5. Turn the dough onto floured board and knead softly 4 or 5 times.
6. Roll/pat out to 2cm thick (definitely no thinner and maybe even slightly thicker!).
7. Use knife to form squares or wedges, or use anything you can find as a circular cutter. I used a drinking glass in the end.  You will have to do the rolling twice if cutting circles because you won't be able to do them all in one go, and the second ones won't rise quite as much because you've worked the dough more.
8. Place on baking tray and flour or glaze the tops if desired.
9. Bake for 10 minutes, checking at 8. They are done when the sides are set.
10. Immediately place on a rack (preferably, I don't have one so plopped them onto a plate) to stop the cooking process.


745 calories per batch


The First Batch


Oh dear, dear, dear. I finally understand why people have always had such trouble with scones.

"Door stops. Hockey pucks."


It browned up nicely and the texture of the top looks nice too. I haven't tried to eat one though. I don't think the problem here was anything with how I worked the dough, though it was too sticky. I think it was more that I just rolled them too thin. Using my 2.6 inch (7cm) scone cutter (which was actually one of those glasses you get when you finish a nutella jar) I got 7.5 scones, I believe, which going by the original recipe's sizes was too many - I should have been aiming for 5, maybe 6 at a push. It was probably closer to 1cm thick than 2cm thick too.


Luckily, because I knew that I probably had some experimenting to do I hadn't just doubled my recipe. Therefore it was time for another go.

The Second Batch


Scone-fection.

I'm making a lot of new scone based words today.

This is how I've always wanted to make scones. I ended up with 4 beautiful, perfectly risen, wonderfully tasty scones. 4. Well, 4 and a half, but the half didn't really meet either the beautiful or perfectly risen criteria. Basically, I think I'll be doubling the recipe in future so I'm looking at 9...

They just looked right; they looked how they look when my Nan makes them. Interestingly, I've since found out that she uses self-raising flour because she finds that baking powder gives them an odd taste, which I don't find, but I'm looking forward to watching her make them over the Easter Holidays. Maybe we'll each have to make a batch of our own scones and see whose wins...


Conclusion


I learned a lot about making scones today, but these seem to be the most important points:

1. Don't overwork the dough
2. Don't roll the scones too thin. 2cm should be your minimum, maybe even slightly thicker. Better to have a few good scones than lots of rubbish ones.

But overall, I'm so happy with the ones that came out well that I'll certainly be making them again!

Tuesday, 28 February 2012

Mary Berry's "Can't go wrong chocolate cake"... it's true!

My copy of Mary Berry's "Fast Cakes" arrived last week and I've been dying to make some things from it since. Mum has a lot of bake sales going on at the charity she works for so I was intrigued to see if any of these could become cost-effective, quick bake sale staples.

I decided to start with the "Can't go Wrong" chocolate cake mainly because of the name. It lived up to it. However, what I didn't take into account was the pre-prep... because that most certainly can.

I spent 40 minutes turning my room over looking for the tin of golden syrup I was 100% certain I'd bought, even going through all my receipts to check that I hadn't just meant to buy it and somehow forgotten... but there it was, in black and white. So where the bloody hell had it got to?

It was eventually solved when I called my boyfriend, who had visited last weekend, to ask if he remembered seeing it. He reminded me that we'd used it to prop open my broken sash window when we were making waffles.

Oh, yeah. Obviously.

The next problem came when I opened up my (second-hand, original edition) copy of the book, smoothed it open, and the first 50 or so pages promptly fell out. Luckily they all fell out in one lump, but still not a great start.


Once the cake was being made, however, it was an absolute dream. It took less than 10 minutes to get it into the pan and into the oven. The original recipe calls for 2 x 8 inch sandwich tin, but I only own 1 x 7 inch tin... but luckily Mary Berry had included some useful conversions, which basically concluded that what fits into 2 x 8 inch tins will fit into 3 x 7 inch tins... and I've always fancied trying to make a triple layer cake!

It was very forgiving. I got the temperature wrong for the first 10 minutes of the first layer - no problem. I had to leave the mixture to stand for an hour because I had to cook each layer separately - no problem. I managed to get the cake out, without even a hint of sticking, the moment it came out of the oven so I could reuse the tin immediately - that was a real novelty to me after getting used to trying to slide things out of my nightmarish 9 inch silicone tin!


A note on icing, however... do wait until the cake is completely cool. Also, like it says in the recipe, wait until you've taken it off the heat and it's thickened up a bit. I couldn't wait, as I had a lecture to get to, and as a result my cake tried to imitate the Leaning Tower every time I turned my back until it had set... However, in the end, it was alright. Not perfectly straight, but straight enough. I actually quite like how it looked because it just reminds me of something you would see at a school bake sale, something a little charmingly slapdash. A cake that doesn't take itself too seriously until you take a bite and realise that, despite the fact that you just bung everything in and whisk it, it's somehow incredibly light.

It's bizzare when, completely by chance, you stumble upon a recipe that takes you back to your childhood. The moment I took a bite of this cake I was transported back to being 7 or 8 years old, at my friend's house, having a piece of cake that either his Mum or Nan had made - I sadly can't remember that part. We had this cake quite often, and as soon as I took my bite today the taste and the texture brought the memories flooding back. It was a very nice moment. 

Update: Upon returning to the kitchen around 2 hours after leaving the cake in there for the people on my corridor, I found that 3/4 of it had already gone! I think that even breaks the Dulce de Leche brownies' record (5 hours for 9 pieces).


Mary Berry's "Can't Go Wrong" Chocolate Cake


I've slightly adapted the original recipe here to fit in 7 inch sandwich tins instead of 8 inch, as that's what I had. The original recipe can be found in many places, such as here, or in her book "Fast Cakes" which can be picked up for a few quid. I've lifted the cooking times and oven temps from her victoria sandwich recipe, which used the 7 inch tins - our oven is usually slow but I found that, for once, the lower end of the spectrum was best for me, so you might want to check it after even less than the alloted time if your oven is a bit fast! I also scaled up the icing recipe slightly to account for the fact you have to sandwich an extra layer in - I think I ended up with marginally too much but it would probably be a good amount if you did let it firm up, as it would be thicker (and harder to spread).

For the Cake
6.5oz (190g) plain flour
2 level tablespoons cocoa
1 level teaspoon bicarbonate of soda
1 level teaspoon baking powder
5oz (150g) caster sugar
2 tablespoons golden syrup
2 eggs, beaten
0.25 pint (150ml) salad, vegetable or corn oil
0.25 pint (150ml) milk


For the Icing
75g butter
6 tbsp cocoa, sieved
3 tbsp milk
225g icing sugar


To make the cake
  1. Grease and line a 7 inch sandwich tin (or more if you have them - you'll be doing 3 layers).
  2. Heat the oven to 350F, 180C, Gas Mark 4.
  3. Sift the dry ingredients into a large bowl.
  4. Beat the eggs in a separate bowl.
  5. Make a well in the centre of the dry ingredients.
  6. Add the syrup, eggs, oil and milk.
  7. Bake in the oven for 25-30 minutes, until it springs back when lightly pressed. 
  8. Turn out onto a wire rack - you don't have to wait for it to cool -  and peel off the baking paper. There's no need to wait for it to cool before doing this, it comes straight off. I don't have a wire rack so just piled the layers on top of each other on a plate as they came out.
  9. NOW leave the cakes to cool for as long as possible, preferably until they really are cool... 
To make the icing
  1. Melt the butter in a small pan, sift in the cocoa, stir to blend and cook gently for 1 minute.
  2. Sift in the icing sugar and add the milk.
  3. Remove from the heat and mix very well.
  4. Now leave it to one side, stirring it occasionally, until the icing thickens (I didn't have time to do this and wish I had).
  5. Sandwich the cakes together then put the remainder of the icing on top. 


Wednesday, 22 February 2012

Solo Pancakes


That could be a sad title. Oh well. I'm contented in my occasional one-ness but for some recipes, it can be a right pain. It was Shrove Tuesday yesterday and I loves me some pancakes... but pancake recipes tend to contain one egg and make about 10 pancakes, which is a fat lot of good if there's one of you. Lots of people in my year here at uni overcame this issue by holding pancake parties, or cooking pancakes as a floor. I didn't. I set out to find a recipe that would scale down well (aren't I antisocial sometimes...).

But I'm happy to say that I succeeded!


It might still be too many for dessert, I'll admit, but I had them for lunch and it was the perfect amount.

Solo Pancakes

Adapted from 'Basic crepes recipe' by JENNYC819 here. I used a bizzare mixture of metric and imperial mixtures (metric for liquid and imperial for everything else) and that you shouldn't strictly do that (at least not when baking) but it was the easiest way I found to measure it. I've since added an alternative recipe at the bottom that made 3 pancakes comfortably.

2oz (60g) flour
1 egg
60ml milk
60ml water
1/4 teaspoon salt
0.5oz (15g) butter, melted


Makes 3 thickish or 4 thin pancakes in a 9ish inch frying pan.

1. Mix the flour (no need to sift unless especially lumpy, you don't need air) and egg.
2. Gradually add in the milk and water.
3. Add in the salt and melted butter, and beat until smooth.

No, that's not noise, that's the melted Stork margarine refusing to mix in properly. Bit predictable. Still, tasted fine. Just give it a good whisk before you put each batch in the pan.


CALORIES = 420 per batch


Tips for cooking:


  • Make sure your pan is really hot.
  • I swear by Fry Light. Easier and healthier than buttering or oiling the pan.
  • Re-oil the pan between every pancake.

  • Learn to flip pancakes well because it impresses people. If you undercook one side, no biggie, leave the side you just flipped to to cook for a while, then flip back over.
  • They keep warm in an oven on 100oc just fine until you've cooked them all and are ready to eat.
Toppings

These worked better with nutella than with lemon and sugar, but I think that's because I tried to cheat and use low cal granulated sweetener and a jif lemon. Go for the real things, people.

Nutella is nom.

Wrap it up goooood.
So Happy Belated Shrove Tuesday, people. I'm giving up nothing for Lent cos I'm happy with everything the way it is right now. The only thing I'd give up is worrying and then I'd worry that I wasn't giving it up well enough, and then I would be trapped in a paradox and..... *pop*

Just enjoy your darn pancakes.


Alternative mix

Makes 3 pancakes. Nice and easy to remember too!

50g flour
1 egg
50ml milk
50ml water
10g butter or margarine
1/8 tsp salt