Friday 27 April 2012

Daring Bakers April 2012: Nazook and Armenian Nutmeg Cake

The Daring Bakers’ April 2012 challenge, hosted by Jason at Daily Candor, were two Armenian standards: nazook and nutmeg cake. Nazook is a layered yeasted dough pastry with a sweet filling, and nutmeg cake is a fragrant, nutty coffee-style cake


NUTMEG CAKE


Well, this was my second challenge, and I was incredibly excited by both the options - I made both!

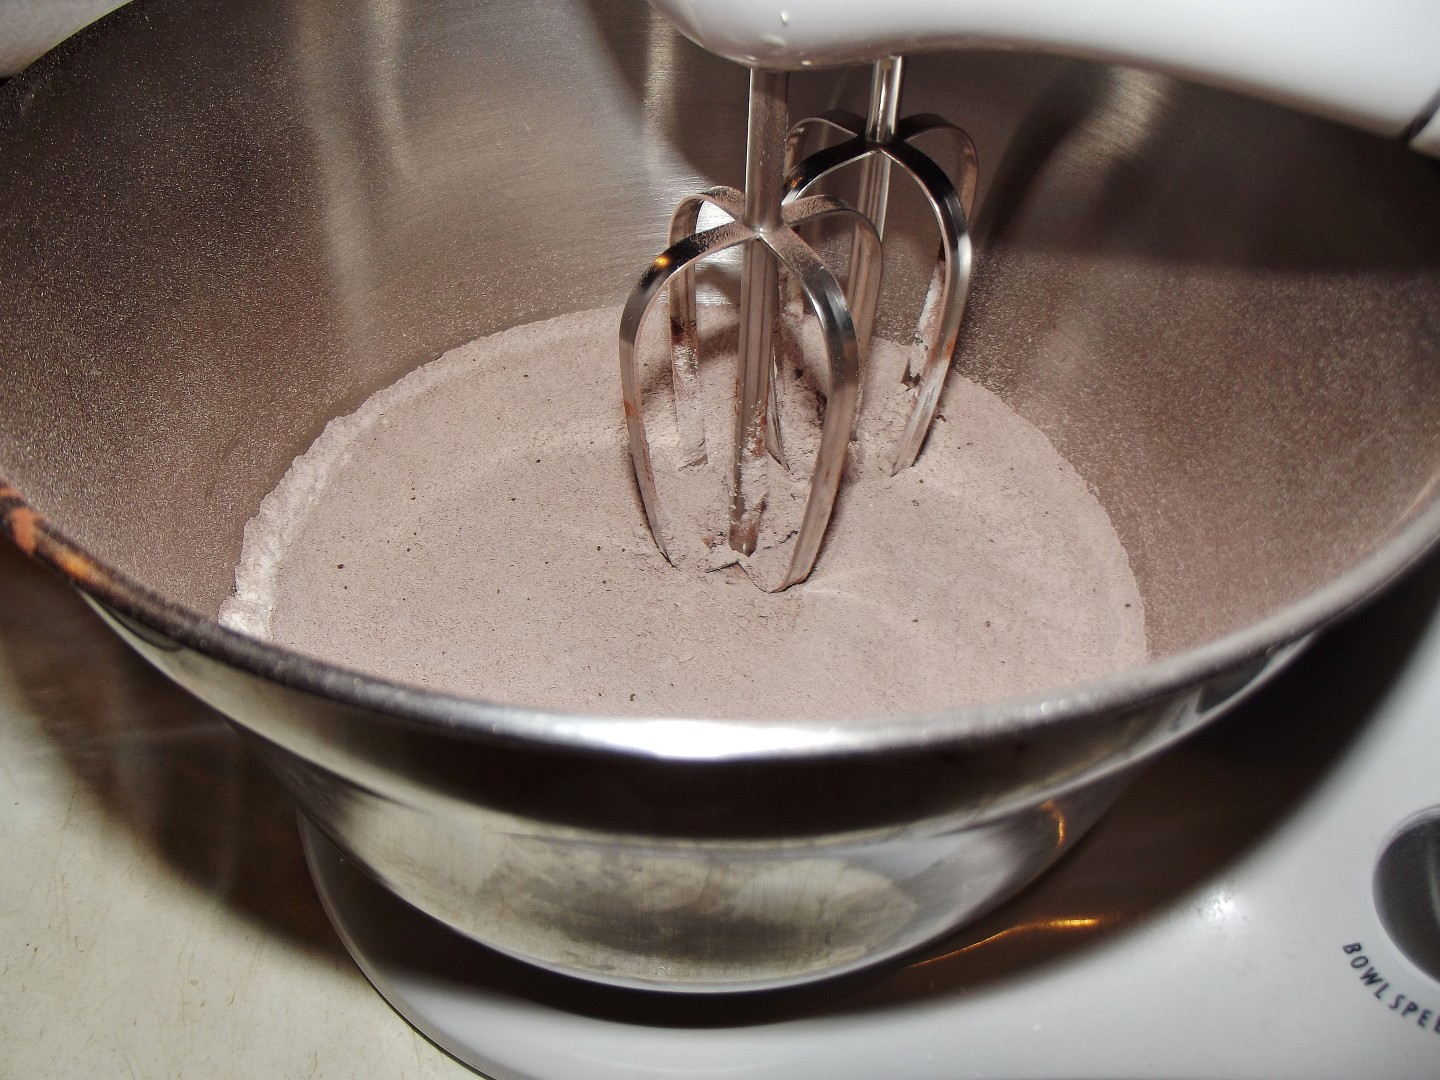
I wasn't originally sure if I'd have time, though, so started with the one that appealed most to me. Nutmeg cake. Ever since discovering that it was this little nut that MADE carrot cake, I've been looking for an excuse to use it again. Well, everything seemed to be going perfectly, but when I went to get it out of the oven at 30 minutes it seemed brown and, had it been any other cake, done, but wobbly. "No big deal..." I thought. "I'll give it an extra five minutes. 30 to 40 minutes, after all". 

So five minutes passed, and no, it was still perfectly, deceptively done on the outside, but completely liquid under the thin crust. So I gave it another five. And another. Then another. Then I put some foil over the top, lowered the temperature by twenty degrees centigrade, and gave it another fifteen minutes. At this point I gave up, took it out of the oven, and surveyed my sticky toffee nutmeg pudding.

I wish I actually knew how to replicate it, because it tastes amazing and, weirdly, a gooey, chewy texture works incredibly well with it!


However, I would have liked to be able to make the cake version too... my main suspect was our oven, which did exactly the same thing to me on the previous Friday when I was making a goat's cheese and onion tart for my family. After it had been in the oven for an hour, double the prescribed time, it was still completely liquid still save for a thin skin. Into the microwave it went, and then it was fine. My brother then made some brownies over the weekend and had trouble with them not cooking through too. So I bought an oven thermometer and, contrary to my belief it might be running far too hot, it was actually running about 10C-20C cool. 


So now I'm still a bit stumped, to be honest. I cooked it at 155C in our fan oven, following the usual tactic of knocking 20C off a non-fan temperature. I suppose it might have been trying to cook at 135C, but then surely it just wouldn't be done on the outside either...? I now keep a closer eye when baking, and tend to put the oven 10C above on the dial.


But I'll definitely be trying this recipe again!

p.s. Excuse the slightly blurry photos, I didn't take much care over them seeing as making a pile of goo look good is beyond my photographic skill. Honestly, the taste makes you forget about its beauty-impairment...

Armenian Nutmeg Cake Recipe
The recipe and directions below are taken directly from the Daring Bakers Challenge sheet provided by Jason at Daily Candor, our host for the month.


240 ml milk (whole was recommended but I used semi-skimmed)
1 teaspoon (5 ml) (5 gm) baking soda
280 gm/10 oz plain flour
2 teaspoons (10 ml) (10 gm) baking powder
400 gm/14 oz brown sugar, firmly packed (I used dark brown soft)
170 gm/6 oz butter, preferably unsalted, cubed
55 gm/2 oz walnut pieces, may need a little more
1 to 1-1/2 teaspoons (5 to 7 ½ ml) (5 to 8 gm) ground nutmeg, preferably freshly grated
1 egg

1. Preheat your oven to moderate 350°F/175°C/gas mark 4.
2. Mix the baking soda (not baking powder; that's for the next step) into the milk. Set it aside.
3. Sift together the flour and the baking powder into a large bowl. One sift is fine
4. Add the brown sugar. Go ahead and mix the flour and brown sugar together. Or not.
5. Toss in the cubed butter.
6. Mash the butter with a fork into the dry ingredients (you can also use your fingers if you want). You'll want to achieve a more-or-less uniform, tan-colored crumbly mixture.

7. Take HALF of this resulting crumbly mixture into your springform (9”/23cm) pan. Press a crust out of it using your fingers and knuckles. It will be easy.

8. Crack an egg into a mixer or bowl.
9. Toss the nutmeg in with the egg.
10. Start mixing slowly with a whisk attachment and then increase to medium speed, or mix with a hand 
whisk if you're doing it manually. Once it's mixed well and frothy (about 1 minute using a standing mixer, or 
about 2-3 minutes of vigorous beating with a whisk), pour in the milk and baking soda mixture. Continue to mix until uniform.
11. Pour in the rest of the crumbly mixture. Mix that well, with either a paddle attachment, or a spatula. Or continue to use the whisk; it won't make much of a difference, since the resulting batter is very liquidy.
12. Pour the batter over the base in the springform pan.
13. Gently sprinkle the walnut pieces over the batter.

14. Bake in a preheated moderate oven for about 30-40 minutes. You'll know it's done when the top is a 
golden brown, and an inserted toothpick comes out clean.
15. Allow to cool in the pan, and then release. Enjoy!


NAZOOK
So, about a week later, I decided that seeing as the nutmeg cake hadn't been the hugest success, I might as well try the Nazook. I even managed to convert my Mum, who was eyeing it suspiciously since it "had an odd name and I don't know if I'll like it" *facepalm*


Well, she did, I did, my boyfriend did, my Grandparents did. Nazook is going to be VERY high on the regular baking list now!


I made two flavours, though I didn't try the original one because I'd halved the recipe and had 2 ideas for my own flavourings. The first was apple, cinnamon and currant, which did explode slightly when baked, though I'm not sure if it might be because this filling was much runnier than my other one due to the addition of the stewed apple.


However, they tasted lovely. These were my boyfriend's favourites.


The other flavour... well, okay, I'll admit I was naughty. Our host said that chocolate wasn't a traditional filling. But we like chocolate in our house… I know, I know, I'm sorry, but I had some good quality baking chocolate just sitting there and it sort of happened. In went a few squares of melted chocolate, a handful of finely chopped walnuts, and now I wished I'd doubled the recipe rather than halved it and made it all with this filling... though my waistline was complaining enough with all the easter eggs anyway! This filling was much thicker, I had to pop it in the microwave for a while to make it spreadable, but while it did expand out slightly it seemed to do so in a far more regular way, and they held together better.

So overall, nazook was a resounding success, easy to make, and it's so nice to have little things for once instead of big slices of cake. Yum and yum.


Nazook recipe
The methodology was the one provided by our host, Jason at Daily Candor, though I've made the odd note. The only part that is mine are my filling variations. I've also halved the ingredients because I found 20 nazook were a nicer number if you were making them for the family, not to take them anywhere special.


Pastry dough - makes 20 nazook (half original recipe)
210g plain flour, sifted
3.5 g (1/2 packet) active dry yeast (I ended up using instant so used slightly less)
112.5 g (
120 ml) sour cream
112.5g softened butter (room temperature)

Basic Filling - make this and add other ingredients afterwards. Fills 20 nazook.
105g plain flour, sifted
170g sugar
85g softened butter (room temperature)


Wash
1-2 egg yolks for the wash (I used an egg white because we had one left in the fridge from something else)


Make the Pastry Dough

1. Place the sifted flour into a large bowl.

2. Add the dry yeast, and mix it in.

3. Add the sour cream, and the softened butter.

4. Use your hands, or a standing mixer with a paddle attachment, to work it into a dough.

5. If using a standing mixer, switch to a dough hook. If making manually, continue to knead for about 10 minutes, or until the dough no longer sticks to the bowl or your hands. If it remains very sticky, add some flour, a little at a time.

6. Cover the dough and refrigerate for 3-5 hours, or overnight if you like.

Make the Basic Filling

1.  Mix the flour, sugar, and the softened butter in a medium bowl.

2. Mix the filling until it looks like clumpy, damp sand. It should not take long. Set aside.

Make the Apple Filling

1. Make up the filling as directed, minus the vanilla.

2. Stew one apple per 1/2 of the filling recipe, cubed, with some water and cinnamon, in the microwave on defrost (approx 300W). I was using a pink lady, not a stewing apple, and it took upwards of 10 minutes.

3. Mix the apple into the filling mixture. I found it to be very gloopy; I'm not sure if it might be worth adding some more flour at this point.

4. Spread the mixture onto the rolled pastry, all the way to the short edges but leaving about an inch of gap before the long edges, and sprinkle with currants, raisins or sultanas.

Make the Chocolate and Walnut Filling

1. Make up the filling as directed, minus the vanilla.

2. Mix in approx 30g-40g of melted chocolate and a handful of finely chopped walnuts. You will have to mix it very thoroughly.

3. I then popped it back in the microwave for around 30 seconds on high to make it easier to spread. Spread the Spread the mixture onto the rolled pastry, all the way to the short edges but leaving about an inch of gap before the long edges,

Make the nazook

1. Preheat the oven to moderate 350°F/175°C/155°C Fan/gas mark 4.

2. Cut the refrigerated dough in half.

3. Form one of the halves into a ball. Dust your working surface with a little flour.

4. Roll out the dough into a large rectangle or oval. The dough should be thin, but not transparent.

5. Spread one of the filling mixtures across the rolled-out dough in an even layer. Try to spread the filling as close as possible to the edges on the short sides, but keep some of pastry dough uncovered (1 inch/2.5 cm) along the long edges.

6. From one of the long sides, start slowly rolling the dough across. Be careful to make sure the filling stays evenly distributed. Roll all the way across until you have a long, thin loaf.


7. Pat down the loaf with your palm and fingers so that it flattens out a bit (just a bit).

8. Apply your egg yolk wash with a pastry brush.

9. Use your crinkle cutter (or knife) to cut the loaf into 10 equally-sized pieces. Put onto an ungreased cookie sheet.


10. Place in a preheated moderate oven for about 30 minutes, until the tops are a rich, golden brown.

11. Allow to cool and enjoy!


Tuesday 24 April 2012

Lemon, Lime and Ginger Nut Squares

Some days you need baking.


It's been a rough few days for me and I've been struggling. So sometimes, instead of staring uncomprehendingly at a screen, or sitting looking into yourself, you should go up to the kitchen and bread a packet of ginger nuts into small pieces using your hands because it's therapeutic and allows your mind to go blissfully blank.

Then you can get all the anger out by squashing them with a wooden spoon too.

As you may remember, I had a lot of limes left over from my strawberry, lime and coconut slices. A big part of student cooking is working out how to use up leftover ingredients. Often you'll need half a pack of something for one recipe, then in using that up you use quarter of a pack of something else... the cycle can seem to go on for a long time.

My Grandma gave us a photocopy of a key lime pie recipe a few years ago and it became a much loved favourite in our house. I had planned to make that one, but when Mum hadn't emailed it to me in time for my weekly shop (it's usually bi-weekly but I just can't face 2 shops this week) I decided to make my own recipe.

And because I'm on a squares kick at the moment I decided to make it in my 8 inch square tin rather than a round tin. It may be because it's a lot easier to judge portions when you're cutting things into squares, in my opinion.


But I didn't want to do the whole thing the American way. Nooooo. I wanted a ginger nut biscuit base. Only I thought 200g of ginger nuts would easily be enough. After all, they only used 250g to do the base AND sides of a 9 inch round tin (about equivalent to an 8 inch square) in another recipe.

So I found myself looking at a tin that was about half covered, with huge, gaping bald patches.

I've felt a bit defeated recently. For some reason staring at that sight roused me. Everything else is going wrong. I'm not going to let my baking go wrong too.

So in went a wodge of flour, some more sugar, some more melted butter. By eye, this was. I'm afraid I can't write it into the recipe so I'll just tell you that it would be a good idea to buy more ginger nuts.

But it worked, so I baked that bit (if it had just been ginger nuts and butter it would have gone in the fridge). And towards the end of making the filling I remembered it was in there so hastily got it out. It was fine.

Then onto the filling. In went the zest of 2 limes, the juice of 3, and the rest of the filling ingredients from a lemon squares recipe. Then I decided it wasn't quite flavoursome enough. In went a huge squirt from one of those Jif lemons... I bought it for pancake day, decided it tasted 'orrible, and then chucked it in the back of my cupboard. I'm glad it's come in handy for something.

A quick note. Scrape the bottom of the bowl after your first mix and mix again. Because I had to mix it in the tin again after finding that a lot of the flour had stuck to the bottom...

And now I won't bore you with a recipe because it was a flop. I went to cut it two hours later and it was a gooey, sticky mess, of which most has gone in the bin, save for a few bits around the edge that had cooked through. Just when you need your baking to go well the most...


Friday 20 April 2012

Strawberry, Lime and Coconut Squares


Tesco and I have an uneasy truce.

It's the best supermarket in our town, but that's not saying much. It's either that or Marks and Spencer (too expensive) or Sainsbury's (less than half the floorspace). Sometimes it plays a blinder and gives me amazing offers. But, seriously, what shop in a student city runs out of:

a) blueberries
b) single limes
c) minced beef
d) packs of 6 sausages


Typically, I had made the trip specially and was not about to make another one. So I now have 6 more limes left to use, and blueberries became some reduced strawberries. I sort of prefer it, I think; I've never been a huge blueberry fan anyway.

So, Tesco, you may have won this time. Though having to queue for 15 minutes is not so cool. You can never tell if people are stocking up for a zombie apocalypse or if it is always just that busy in there.


Anyway, with my tales of substitutions and bulk buying of limes done (seriously, what am I going to do with 6 limes?) we can move onto the recipe and my favourite new recipe book. Red Velvet Chocolate Heartache by Harry Eastwood called to me for days. "Buy me" it yodelled from Amazon's pages, "and I shall make cake a healthy treat......."

Which is why, as I write this, I am stuffing my face with an absolutely ginormous slice of this cake and marvelling that it's under 300 calories. I mean, wow. It doesn't taste worthy. It tastes fruity and gorgeous and is incredibly moist. Harry Eastwood is on to a real winner; I can't wait to make more recipes. And the girly-girly cloying personification of all the cakes that so many of the reviewers have loathed? I like it. It's cute. It makes the book nice to read cover to cover again and again.


It also comes with calories tables, which makes me happy, especially when I see the numbers in them.

Anyway, make and enjoy this. The next post is going to be Key Lime Pie. The post after that may well be a Cosmopolitan Cocktail. I'll STILL have 3 more limes to go after that... On the plus side, no scurvy?

Strawberry, Lime and Coconut Squares
This recipe is mildly adapted from "Red Velvet Chocolate Heartache", in which Harry Eastwood replaces butter with vegetables and you end up with magic cakes. I'm not kidding. They taste lush and you can eat more while gaining less. Win? Yes. Just don't tell people you've put courgette in their cake until after they've eaten it. Or why not just not tell them? They'd never guess.


For the Base
80g caster sugar
20g unsalted butter
Pinch salt
150g dessicated coconut


For the sponge
150-200g Strawberries, Quartered and then chopped 3 more times (or basically chopped into small, blueberry sized pieces)
150g courgette, topped, tailed, peeled and finely grated (I used one fairly large courgette that weighed about 200g with the skin on, and still had some left to spare)
Juice and Zest of 2 limes
120g plain or rice flour (Harry Eastwood has tested all the recipes with both and actually says rice flour is better!)
2 medium eggs
1/4 teaspoon salt
2 teaspoons baking powder (I used 3 large ones because my baking powder is oooold now)
150g caster sugar

For the topping
Icing sugar, to sprinkle


1. Preheat the oven to 180C and grease and line a 22cm (8 inch) square tin. (Harry recommended oil, I would just go back to greasing with butter in the future, it sticks to the tin better...)

2. Melt the butter and sugar for the base in a saucepan until you have a paste. Place the dessicated coconut into a bowl and pour this mixture over the top, mixing well with a spoon, palette knife and/or your fingertips.


3. Press the base into the lined tin and press down with a spoon to pack it firmly. Place into the oven for 10-15 minutes, until fairly brown.

4. While this is in, whisk the eggs and sugar together until light.

5. Add the zest of the limes and the grated courgette (I grated the latter into a separate bowl for measuring purposes... and it's not that easy) and mix thoroughly again (I was using my hand mixer).

6. Add the flour, salt, baking powder and lime juice. Beat again until combined (yup, it says beat, not fold. I had no problem with the cake being dense despite just basically chucking everything in).


7. Pour the batter over the base (I hope you've been keeping an eye on the time, the intermediate steps took longer than the 12 or so minutes it took my base to cook) and then sprinkle the chopped strawberries over the top.

8. Cook for around 30 minutes.

9. Remove from the oven and leave to cool in the tin for 10 minutes.

10. Sift some icing sugar over the top and slice into 9 pieces in the tin before removing the slices.


CALORIES PER SLICE: 262


Italian Chicken Bake

It's always satisfying when you cook something and immediately start thinking of the next available opportunity to cook it again.


Discovering a new family favourite is a treat, and when it's as easy as this, it's even more of one. From a student's point of view, it reheats well, and the original recipe scales down to make two portions nicely too (which is what I will be putting here). It goes well with garlic bread, potatoes, neither, or both.

You can use cheap chicken breasts because there's so much else in there that you can't tell if they're organic or Tesco Value. Finally, you can use chorizo or pepperoni, whatever floats your boat. There are still a few tweaks that I'm going to try. When I made it for myself the first time I used a whole large onion - that was too much. I also think it could survive with half the amount of tomatoes, though I haven't tried that yet. Basically, instead of 2 400g tins for 4 people, I would use 1. For the 2 person version, I'd try the 200g tins I know Tesco sell. I think it would make it slightly less runny (though those juices are soooo tasty mopped up with garlic bread) and not really much less filling.

The recipe calls for 3 diced chicken breasts between 4 people, and even with 2 big eaters we found there was a lot. I made it for myself with 2 chicken breasts, which lead to some huge portions, though eating it never feels like a chore.

So thank you Fay Ripley!

Italian Chicken Bake for 2 (Or a student with a microwave)
This is halved from the original recipe in Fay Ripley's cookbook "What's for Dinner", which I won from the lovely Kelly-Jane at "Cooking the books with Kelly-Jane". I'd made a few very slight modifications - increasing the amount of garlic, decreasing the amount of tomato and swapping the pepperoni for chorizo.


2 skinless chicken breasts, diced
2 cloves of garlic
1/2 an onion
200g tin chopped tomatoes
60g mozarella (approx half a ball), reduced fat if you can get it (I couldn't tell the difference between the reduced fat and the full fat one)
1tsp dried oregano
40-60g chorizo


1. Preheat the oven to 200C/180C fan/gas mark 6. In a frying pan, fry the onion in the oil until translucent.
2. Add the diced chicken and fry for 5 minutes.
3. Add the garlic and oregano and fry for 1-2 minutes before pouring in the tomatoes. 
4. Let it gently bubble for 5 more minutes.
5. Pop the lot into an ovenproof dish and top it first with the mozzarella, then with the pepperoni. I found it fitted quite nicely in a 7 inch sandwich cake tin. You basically don't want it all spread out thinly else you'll get big patches with no cheese.
6. Bake for 25 minutes.
7. Serve with new potatoes and garlic bread. 

APPROX 400-450 CALORIES PER SERVING (NOT INCLUDING GARLIC BREAD AND NEW POTATOES)

Wednesday 18 April 2012

Wordle

This would appear to be just how much I like chocolate...


Yes, chocolate is the most referenced thing on the entire blog.

Wordle's are fun, and a good way of avoiding writing essays. Highly recommended. Thanks to Cher Rockwell at "The not so exciting adventures of a dabbler" for making me aware of their existence!

Thursday 12 April 2012

Twice-baked Half-baked Apple and Custard Pie

Disasters can be salvaged.


Sometimes a crisis in cake making isn't the end of the world after all. If all the bottoms drop out of your mini apple pies and you end up with a huge pile of pastry and appley gloop, you have two options. You can stand there and yell in frustration, or you can think on your feet and make something new out of it.

More and more, I'm trying to do the latter. On this occasion, it led me to a new recipe that I'm probably going to make on purpose in the future. This is almost becoming my favourite part of baking; turning something that would have been binned into something tasty, in this case a cross between a custard tart and an apple pie; I'm just saving you from having to make the custard later. If I'd made this in a square tin you would have been able to cut these up and eat them as bars. Oh, the possibilities!

The main lesson for today though, is that individual pies are a whole different world; one I won't be tackling again for a while unless I fancy making this again soon. Which I do. Hum...

Twice-baked Half-baked Apple and Custard Pie


Any amount of leftover (or disaster) apple pie, broken up
About 1/2 pint custard
Nutmeg
Caster sugar, for sprinkling


1. Arrange the crumbled pie (not finely crumbled, with fairly big pieces of crust remaining) in any baking tray or Pyrex dish
2. Pour the custard over the top. Top with some grated nutmeg and sugar.
3. Bake, at around 180C, for around 40 minutes, until browned and set. I ate this cold; whether it's nice hot... I don't know.


Wednesday 11 April 2012

Avocado Chocolate Muffins

Veg cakes are my new obsession.


I really want "Red Velvet Chocolate Heartache" by Harry Eastwood. I've been reading every review I can find. But with my "NO MORE COOKBOOKS" self-imposed rule, I'm having to regularly slap my hand away from the "add to basket" option on amazon. But when I realised Mum had an over-ripe avocado in the fridge that was about to be chucked, I nabbed it and made muffins instead.


I liked these, personally. I think, unlike a lot of veg cakes, you CAN taste the avocado, but that may be due to my substitutions and my confusion with avocado sizing. They were not very sweet, but I enjoyed that. I have an insane sweet tooth (people nearly faint when I tell them I take 3 sweetener tablets in my tea) but I do like bittersweet or just plain unsweet sometimes. Next time I'd make sure I have enough maple syrup because I had to use half maple and half golden, and I hear that golden isn't as sweet.


P.S. Nutella in the middle makes everything better. Except perhaps roast chicken. I wouldn't put it in that.


I think it could have perhaps done with a little thinning out, though (but in our cold house, from about October-April the Nutella is a solid block you have to chip bits off with a hammer and chisel).


Avocado Chocolate Muffins
Mainly adapted from the recipe here. My big difference was to halve the original recipe, hence some slightly awkward measures, and to replace some of the cocoa powder with flour, as we were running a bit short. The other difference was to add the optional Nutella centre. 


Makes 6 fairly large muffins

3/4 cups + 3tbsp plain flour
3tbsp unsweetened cocoa powder
1/2 teaspoon baking powder
1/2 teaspoon baking soda
3/8 teaspoon salt
1/2 medium-sized ripe avocado, pitted and peeled (I used 80g)
1/4 cup + 2tbsp pure maple syrup
1/4 cup + 2tbsp milk
2 tablespoons + 2 teaspoons olive oil
1 teaspoon pure vanilla extract 

6 teaspoons Nutella (optional)


1656 calories per batch
276 calories per muffin (6 muffins)


1. Preheat the oven to 350°.
2. Grease muffin tin and set aside.
3. In a large bowl, whisk together the flour, cocoa powder, baking powder, baking soda, and salt.

4. Puree the avocado in a food processor, or mash it by hand.
5. Combine the avocado with the maple syrup, rice milk, olive oil, and vanilla extract, in a food processor or by hand with a whisk.


6. Add the avocado mixture to the dry ingredients, whisking until combined. 
7. Divide the batter between the muffin cups. To make it a bit more interesting, I added some melting Nutella centres. I put about half the mix into the bun cases.


Then I added a teaspoon of nutella to the middle of each one, before spooning the remaining mixture over the top. 


8. Bake for 20-25 minutes or until a toothpick inserted in the center comes out with just a few crumbs. 

9. Cool the muffins in the pan, on a cooling rack, for at least 10 minutes before removing them from the pan to cool completely. These muffins are super moist and may break if you remove them from the pan while they are still hot. Dust with icing (powdered/confectioners) sugar if desired.

276 CALORIES PER MUFFIN.

Tuesday 10 April 2012

"Don't Kid Yourself" Flapjack

I think I've discovered the root of the obesity crisis.


You see, my brother is doing food GCSE, and the other day he made the most awesome flapjack. Seriously, this stuff tastes great, and it really made us think about what you can happily add to the mix fruit and nut wise.

But his school-issued recipe book calls them Museli bars.

Now, I'm sorry, but these things have 175g of margarine, 150g of sugar and golden syrup in. We made about 16 slices... Now, with the oats too, plus the fruit, nuts and chocolate chips...


Basically, "Don't Kid Yourself". These AREN'T museli bars, as far as I'm concerned, and while they might give you some good oats and good fruit, they're also going to give you a sugar rush.

But as a treat? Yes yes yes. With a cup of tea and one of these, preferably warm from the oven... yum.

"Don't Kid Yourself" Flapjack
This recipe comes from a booklet my brother was issued by his school for his food GCSE course, so I'm not quite sure of the original writer. A nice flavour combo we've been using is cranberries, raspberries and white chocolate chips. 


175g margarine
150g light brown sugar
2tbsp golden syrup
375g oats
1 tbsp plain flour
200g fruit/nuts/chocolate chips/assorted kitchen cupboard lint (metaphorical)
1tsp mixed spice/cinnamon/ginger (optional, we don't)


1. Preheat oven to 180C/160C fan

2. Add the margarine, sugar and golden syrup to a large frying pan and heat, stirring, until melted.

3. Remove from the heat and mix in the remaining oats.

4. Press down into a greased, lined 8*12 inch tin (We don't have one, so I used an 8*8 and put the remainder into a loaf tin - nice sized pieces were had by all).

5. Cook for 25-35 minutes, or until golden (We did it for 25, it will firm up a bit more once it cools).

6. Mark the slices in whilst still warm, then leave to cool before removing from the tin. I had used an oversized strip of greaseproof in the tin to make lifting them out super easy.


Calories per batch (excluding fruit and nuts): 3186 calories
Calories in our example batch (cranberries, hazelnuts, raspberries and milk chocolate chips): 3812 calories
Calories per slice (Made 16): 238 calories


Okay, it's better than most cakes, but still... it's not a cereal bar, so don't treat it like one... please? 

Saturday 7 April 2012

Cake Pops


If I ever set up my tea and cake shop, I already have a vague idea of the menu:

Cadbury's Chocolate Philadelphia Cheesecake
Large, American Style Chocolate Cupcakes (preferably with a liquid centre)
Welsh Cakes
Gateau Au Yaourt
New York Cheesecake, with a different filling depending on the day of the week
Home made ice cream (including Turkish Delight flavour because I haven't seen it for years)
Chocolate and Coffee Banana Layer Cake with Pecan Icing and Walnuts, for my Mum
Chocolate Guinness cake with cream cheese icing (Philadelphia are going to be making a fortune off me, aren't they…)
Hot chocolate made with various chocolate bars


And especially Cake Pops.


People like cake pops. They like the brightness, the novelty factor. They are easy to make look pretty once you realise a few little things about the technique, and they are infinitely variable using the odds and sods of decorating items you've picked up over time.


I used sprinkles, chocolate shapes, mini fudge, 4 flavours of chocolate cake coating, wafer flowers, easter rounds, mini eggs, jelly sweets, hundreds and thousands… you get the picture.


Oh, and chocolate chips. I do believe that some of them ended up looking rather like UFO's because of said chocolate chips, but that's part of the fun.


I don't think I'd get bored of making these things. In fact, I'm positively excited about the idea of making them again and experimenting with some of the more daring designs, a la bakerella. I want to make the original cupcake style ones (once I can overcome the eyewatering price of the mould…). I want to make bunnies and chicks (although that might be next year now) and cats and mice and… oh, anything that takes my fancy. Christmas puddings. A cake pop for every season, in short, and I'm going to do them my way, with a little bit of guidance from the masters. By my way I mean finding a cheapish way to do it; a student loan doesn't cover baking ingredients brilliantly (though it does go MUCH further if, like me, you're not an alcoholic… I mean a normal student) so I spend my working hours dreaming about cakes, then go home and bake them. But, basically, it does make me wince at the price of good quality cooking chocolate, for example. I bought 20 blocks when it was last on offer… I emptied out Tesco's!


Anyway, I'll shut up about the cost of baking now and get on with the popping.


Cake Pops 


I took advice from a few different recipes about the best kind of cake and frosting, then just went mad with my own decorations. I'd advise you to do the same, especially for your first attempt if you're not already a very confident cake decorator - some melted chocolate and sprinkles, done creatively, can still make people's mouths water.


1. Make up a Betty Crocker Devil's Food Cake mix as directed, then bake. I used a 9x13x3 roasting tin, as opposed to the 9x13x2 tin they specify, and it still rose beautifully and was INCREDIBLY moist. You're just going to be crumbling it up anyway, so when it comes to getting that size of cake out of the tin… well, you don't have to make it pretty. Mine got cut in half and folded onto a cooling rack because it wouldn't fit onto one and ours are two different heights! I would definitely recommend greasing and lining the tin though.

2. Once fairly cool, crumble the cake into a LARGE bowl. I left it for an hour at this stage until it was completely cool.

3. Add your frosting. Now, this is where it's up to you and your feel. If you've made cake truffles before, you know the consistency you're looking for - basically, you want to add enough frosting to make it all stick together, so you can roll them into balls, but you don't want so much that it ends up incredibly sticky because you're going to be hard pressed to make it less so… I used about half a tub of Betty Crocker Fudge Frosting, so I'd say start with a quarter and then add more about a tablespoon at a time. Now, most recipes say to use vanilla buttercream, and I probably would next time, though I don't know how this would alter the amounts. I only used this one because I got confused in the supermarket! Still tasted very yummy, though.

4. Roll your pops up! Now, I had about 800-900g of mixture - it should be the sort of lump you can pick up, take out of your bowl and weigh. I placed the now empty bowl back on the scales, zeroed, chucked the mix in, then divided this by 50. Each cake pop was then weighed individually so they were a fairly uniform size - I found that you start to judge it better and better.


My pops weighed from 17-20g each, and I ended up with 47, which I was happy with - 45 fitted nicely into my stand, and that left one to try and one to save for my little brother!


The best way I found to roll was to take your small balls, squish it quite hard a few times between your palms, then roll it more lightly into the ball shape. This ensures it holds together well and has a nice smooth surface. Place the balls onto greased, lined baking trays, and refrigerate for a few hours at least. I refrigerated mine overnight and that meant they were nice and firm to work with in the morning.


5. Melt your chocolate. Now, I used several different types of chocolate, but for the 45 pops I'd estimate that I used 450-500g of chocolate. I used these silver spoon chips for the flavoured ones, but this is quite an expensive option - the white chocolate and milk chocolate cake coverings from silver spoon work nicely, and I assume they have been tempered so you don't get that bloom, though I can't say for sure. It says that you get a glossy finish, at least! You may want to double dip the white chocolate ones, however.

Now, when you're dipping, you preferably want to melt it into something deep, rather than a wide bottomed bowl. I used a bowl for the flavoured chocolate and found it more difficult to get a smooth finish, though it is also important to re-melt your chocolate for 10 seconds or so periodically. Using a jug, which meant I could dip the whole pop in at once, was much easier.


First dip your sticks in the chocolate, then push them into your pops - you want them deep, though not all the way through. Preferably leave them to set for a little while.


To cover it, dip it, then tap it on the side of the bowl or jug whilst rotating. You'll get the hang of it! You need to judge when it is still wet enough to add your decorations, but not so wet that it will drip everywhere. The coloured stuff dried a lot faster than the chocolate - the white and milk chocolate took a lot of spinning and tapping to get it smooth! I promise that it's worth the effort, though, for the smooth finish!


6. I don't have much to say about decoration except let your imagination run wild!


Use anything and everything, and make sure to look in supermarkets for when they have 3 for 2 offers on decorations. Variety is the spice of life, after all…


7. Once they're done, the best place for them is in a polystyrene block, which we had in the loft. An alternative would be in a shoebox or similar. Use a skewer to make holes in it and they will stand beautifully. I wonder if you could use oasis? A bouquet of cake!


And there you have cake pops! These will certainly turn some heads at charity cake sales, birthday parties, and anywhere else you care to take them.