Saturday 30 March 2013

Daring Bakers March 2013: Parsnip and maple cake

Ruth from Makey-Cakey was our March 2013 Daring Bakers’ challenge host. She encouraged us all to get experimental in the kitchen and sneak some hidden veggies into our baking, with surprising and delicious results!

DSCF1556


Oh dear. Let me explain.

House flood, university exams, no-one to bake for at university, no time to blog... the list goes on. I'm popping back in to say hi and maybe bye... Pipsqueak's Noms may become regular again one day, but that day is well in the future. I'm loving baking and cooking, I'm learning more about eating well and creatively, budgeting, planning... and I'm thankful that I started this blog because it was the first step on that important journey. However, I only have time to bake, or blog about baking - not both! I can do the first without the second, but not the second without the first, if you see what I mean...

DSCF1564

The last few Daring Bakers challenges haven't been ideal for me as they've involved things that are either very time consuming or make huge quantities, so the last one I did was December. However, when March's challenge rolled around, I was chuffed. Vegetable cakes! I'd had my eyes on a parsnip, maple syrup and pecan cake from BBC Good Food for a few weeks, and now I had a real excuse to make it. Since trying waffles, maple syrup has become a staple in my baking and on my pancakes/waffles/omelettes/straight out of the bottle... okay maybe not that last one (yet), but you get the idea - I love maple syrup. So does my boyfriend, probably even more than me, so I knew I'd have at least one compatriat in cake. My Mum likes pecans, so there was another confirmed eater. Overall, I got the feeling this would be a promising cake to bake...

DSCF1544

I adored this cake and it's one of the few that I've made where I kept sneaking back to the fridge for more - I usually have a bit more restraint than that. It's fascinating as some people can identify the parsnip straight away, others can smell it but can't taste it, and others still (like myself) couldn't have guessed it was parsnip in a million years, but liked it anyway. I personally found it to be very much like carrot cake, but... better? I'd say better. Slightly different. Still moist. Moreish.

DSCF1562

If it weren't for the grating I'd make it more often... seriously, I HATE grating, and grating 3 parsnips and an apple when I was meant to be revising... the revision actually sounded more enjoyable.

DSCF1565

But it's worth it really. A hearty recommendation and a real recipe for the binder.

DSCF1560

Grab the recipe HERE and get your grater ready...


Tuesday 27 November 2012

Daring Bakers November 2012: Twelve Days of Cookies

Holiday season is the time for sharing and Peta of Peta Eats is sharing a dozen cookies, some classics and some of her own, from all over the world with us.

Chocolate Biscuit Cake

Life has been a massive pain in the derriere in terms of my baking this term. 

Basically, I'm back at university and I have baked ONCE. That was these cookies, when I went home for a weekend to visit my family and my boyfriend... I will admit right here and now that I only did half of my Daring Baker's challenge this month, and my Mum did the other half! I couldn't do last month's challenge because I had essay deadlines and practical writeups and cycle training and... well, what is one person going to do with an entire Mille Feuille? Seriously?

Chocolate Sables

Well, eat it is the obvious answer. But that would be bad. And I actually would do it because I hate wasting food, especially stuff I've gone to the effort of baking. So no Mille Feuille for Pipsqueak if I don't want to have to rename this blog to "Gigantosaur Blob's Noms".

Chocolate Biscuit Cake

The month before was Empanada Gallega, which sounded amazing but again, I had no time. The month before that was Pate a Choux swans. I really wanted to do this but my month was consumed by my Grandparents 3 tier Golden Wedding Anniversary cake. I still haven't had chance to even write the blog post to accompany the photos! The swans would have been perfect for the party but I'm not known for being that artistic and I think rather than looking like swans they might have ended up looking like a bunch of greater Adjutants instead... or hippos.


So, anyway, I chose to do the Chocolate sables, and Mum made her famed (in our household) chocolate biscuit cake.

Chocolate Sables

NOTE: Our house has been flooded with all this terrible weather we've been having. I'm writing this post back at university still so I haven't seen the damage first hand, but my family are now in a hotel and we'll be moving into rental accommodation soon, so this is the last post from my kitchen as I knew it for the past 7 years.

Chocolate sables

Warning: grating chocolate for half an hour is NOT FUN.

Chocolate Sables

These were nice. Really quite nice, actually. They went very quickly.

Chocolate Sables

But I do value my time. I could have been looking cats on the internet in that half an hour. Therefore, anything with grated frozen chocolate is being given a wide berth by yours truly in the future. No matter how tasty the darn things are...

Chocolate Sables

Get the recipe here.

Pipsqueak's Mum's Chocolate Biscuit Cake

This, on the other hand, is a family favourite. It uses up any old biscuits, is really quick and easy to make (and a good way to vent your frustration because you get to attack biscuits with a massive rolling pin), and I think it might actually get my boyfriend baking because at the moment he can only get it at my house and this is not frequent enough...

Chocolate Biscuit Cake

The recipe originally came from our very old Sainsbury's baking book, which has some great staple bakes in. We've modified this recipe a fair bit over the years, but it's versatile, and you can tailor it to your own tastes. I posted a different chocolate biscuit cake recipe on here before but it was a momentary dalliance. I love you, Mum's chocolate biscuit cake. You're the recipe for me!
Chocolate Biscuit Cake

p.s. Mum made it with malted milks this time. I nearly died from the happiness overload this gave me (weirdly, I hate ovaltine). Our standard is basically digestives if we're buying in, but anything in the cupboard works a treat!

Chocolate Biscuit Cake

Original recipe
This is the recipe as it appears in the Sainsbury's baking book. I almost uploaded the photo that Mum sent me of the recipe, but the book is in quite a state after being used a lot for as long as I can remember...

Biscuit cake
125g (4oz) margarine
50g (2oz) caster sugar
2 tbsp golden syrup
2 tbsp milk
2 tbsp drinking chocolate
1 tbsp cocoa
250g (8oz) digestive biscuits, crushed
50g (2oz) cake crumbs
50g (2oz) glace cherries, chopped
50g (2oz) raisins

Chocolate icing
125g (4oz) plain chocolate
15g (1/2oz) butter

1. Place the margarine, sugar, syrup and milk in a pan and heat gently

2. Add the drinking chocolate, cocoa and half the biscuits and mix well

3. Add the remaining ingredients and stir until throughly mixed

4. Press into a 20cm (8 inch) sandwich tin

5. Chill in the refrigerator until set, then remove from the tin

6. To make the icing, melt the chocolate and butter in a small bowl over a pan of hot water and mix well

7. Spread over the biscuit mixture and allow to set, then cut into wedges

MAKES ONE 20CM (8 INCH) ROUND

Pipqueak's Mum's recipe

Coming soon...

Friday 5 October 2012

Raspberry Filled Vanilla Cupcakes


Time.

Time has been something I seem to have had too little of all summer. No time to blog. Running from my job to my family to my boyfriend, and the crazy cycle just went on and on for 3 months. 

Now I'm making time again. I'm back at university, with a lot going on, but somehow, more time. Not travelling for 9 hours a week helps... my lectures are a 10 minute walk and town a 20 minute walk. It would be even better if my bike hadn't been stolen so I could get there even faster.


But actually, maybe I don't want to get there fast. Sure, sometimes the 20 minute walk into town just because you forgot to buy one thing off your shopping list that you cannot live without (for example, washing powder) seems like a big annoyance. But most of the time, walking is something I can enjoy, because I have to do it... but it's me time too.


These cupcakes were about taking time too. They were made for my very special boyfriend, who after much deliberation, designed this cupcake, and I made them. Slowly, unhurriedly.

Well, the second time I did, after I had managed to completely ruin the first batch...

You need to double up the cupcake recipe for these buns to work. If I had taken the time to read more of the comments, I would have known that. 

So yes. Time. 


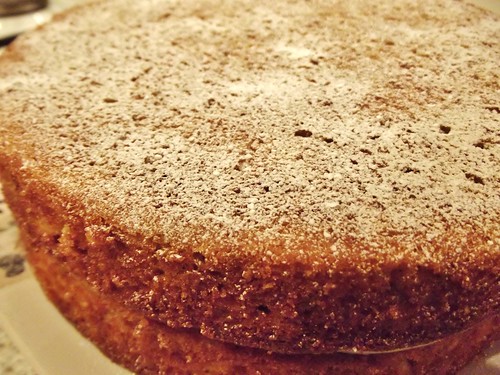
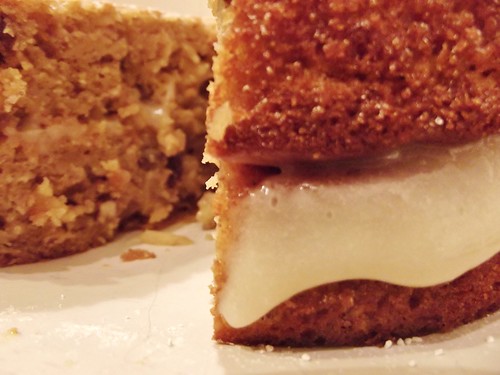
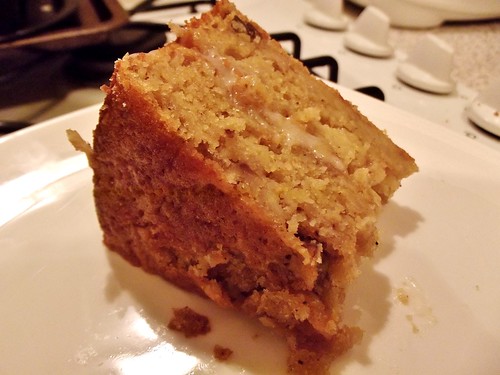
The flavour, texture and decoration of these combined to make them the cakes I am probably the most proud of. The coulis/jelly in the middle was my own muddlings, the icing was tweaked slightly by me, the cakes came out level and nicely browned... But credit still goes to my boyfriend for the concept. I think he might have a knack for the ideas side of things...

And they got me A LOT of attention. Which was actually really nice. A guy at the train station asked if I had made them, and pronounced my boyfriend very lucky. Then I met a lovely lady who I chatted to about her time in the WI, baking and jam making, and she pronounced that Harrods would be proud to have these cupcakes.

Well, a girl's ego does like that kind of praise.


So these cakes brought me conversations I would otherwise not have had, calmness I hadn't had in a while, and satisfaction in creative baking. I hope you enjoy these as much as we all did! 


Recipe: Hummingbird Bakery Vanilla Cupcakes
This recipe is double the first one I used; if you are making it in muffin cases, you absolutely need this much mixture. Don't skimp on the whole milk either, you'll use most of the rest when making the icing. This made a comfortable 12 for me. The recipe came from here.

240g plain flour
280g caster sugar
3 tsp baking powder
a large pinch of salt
80g unsalted butter, at room temperature
240ml whole milk (buy a pint because you'll need some for the icing)
2 eggs
1/2 tsp vanilla extract


1. Preheat the oven to 170°C (325°F) Gas 3. (I went for a smidge over 150C in a fan oven)
2. Put the flour, sugar, baking powder, salt and butter in a freestanding electric mixer with a paddle attachment (or use a handheld electric whisk) and beat on slow speed until you get a sandy consistency and everything is combined. 

3. Gradually pour in half the milk and beat until the milk is just incorporated.
4. Whisk the egg, vanilla extract and remaining milk together in a separate bowl for a few seconds, then pour into the flour mixture and continue beating until just incorporated (scrape any unmixed ingredients from the side of the bowl with a rubber spatula). Continue mixing for a couple more minutes until the mixture is smooth. Do not overmix.
5. Spoon the mixture into the paper cases until two-thirds full and bake in the preheated oven for 20–25 minutes (I think it might have taken a bit longer than this if my memory serves me correctly, more like 25-35...), or until light golden and the sponge bounces back when touched. A skewer inserted in the centre should come out clean. 

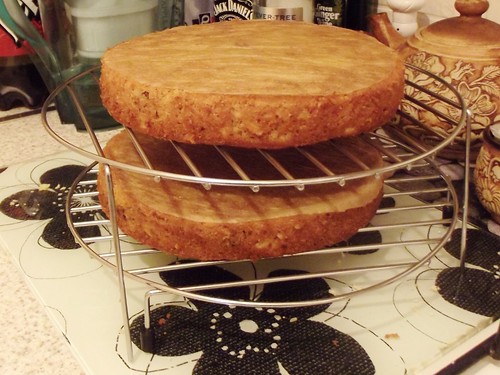
6. Leave the cupcakes to cool slightly in the tray before turning out onto a wire cooling rack to cool completely.

Recipe: Raspberry Cornflour Jelly

1. Dead simple. Place about 10 raspberries (I only used 6 and it was a bit tight) in a saucepan. Heat until they break up. Add a dash of lemon juice and sugar if you so wish.

2. Add cornflour, stirring continuously, until the mixture thickens. You want it quite thick, but remember it will probably congeal more as it cools.

Recipe: Hummingbird Bakery's Modded Raspberry Icing
I'm pretty sure I used the original measurements for this icing as a lot of people had commented that they had a lot left over after icing, so with this + filling, it was about right...

350g icing sugar, sifted
80g unsalted butter, at room temperature
25ml whole milk
a couple of drops of vanilla extract
about 10 raspberries (I used about 6 and would have liked a stronger raspberry flavour)

1. Put the raspberries in a pan on the hob until they break apart. Strain through a sieve and leave aside to cool.

2. Beat 250g of the icing sugar and  80g of butter together in a freestanding electric mixer with a paddle attachment (or use a handheld electric whisk) on medium-slow speed until the mixture comes together and is well mixed.

3. Turn the mixer down to slow speed. Combine the milk and vanilla extract in a separate bowl, then add to the butter mixture a couple of tablespoons at a time. Once all the milk has been incorporated, turn the mixer up to high speed.
4. Continue beating until the frosting is light and fluffy, at least 5 minutes. The longer the frosting is beaten, the fluffier and lighter it becomes.

5. Now set aside enough plain buttercream to fill 12 cakes.

6. Add the raspberry juice to the remaining buttercream and sift in icing sugar, mixing, until the consistency becomes pipeable.

Assembly and decoration

1. Core the cupcake - I used a sharp, thin paring knife. Trim the bit you've taken out so it will fit back on without too much of a bulge. 

2. Take a spoonful of the raspberry jelly and place it in the hole (be conservative, but not too conservative, just remember that you need enough for 12 cakes).


3. Top this with a whole raspberry.

4. Top this with a generous splodge of the reserved plain buttercream.


5. Place the topper back on.


6. This was my first ever time piping. I don't think it came out too badly, do you? I used a plastic ziploc bag after hearing from a cake teacher that these tend to be easier to work with than the fabric ones (and less cleaning!). We have an abundance of nozzles in our kitchen. Pipe a swirl of icing on the cakes, ending in a peak which you will pop the raspberry on (so it doesn't HAVE to be peaked but it's fun to practice).

7. Admire your little pale pink dog poos.


8. This step is optional. Leave a heavy metal spoon in the bowl of your stand mixer. Turn the stand mixer on. Panic as heavy metal spoon is catapaulted across the kitchen. Bend mixer. Forget to tell mother and only remember when she gets confused emptying the dishwasher.


9. Top the cakes with a drizzle of melted chocolate (I went for milk).


10. Top each cake with a whole raspberry. I put them the 'normal' way up. Some people have since pointed out to me that they may have looked better with the hole pointing down. I don't know. I quite like them like this.


11. Eat. Preferably give a few to loved ones. And resolve to buy a new mixer blade at some point.